Print to pdf and a physical printer at the same time / PDF Printer
Sometimes you want to send the print job to both a PDF document and a physical printer. This article will show you how to do just that.
Use PrintToPrinter configuration
Since version 10.14 Expert Edition, the PDF printer can be configured via a set of PrintToPrinter settings options to forward the print job to another physical printer after a PDF creation.
The following example illustrates a simple PrintToPrinter configuration. The last three settings indicate that the print job will be passed. This is defined with PrintToPrinter=yes. PrinterName = Brother selects the physical printer, and with the last setting, PrinterSelection = specific, we tell the printer to use the printer specifically selected with PrinterName. The following global.ini configuration file was taken from an installation of our PDF printer as a PDF network printer.
[PDF Printer]
; This is a sample global.ini file.
; It illustrates some common settings that can be found of this type of ini file for a shared printer.
; All lines prefixed with a semicolon are comment lines. Remove the semicolon on the lines below to activate the settings.
; More information on the individual settings can be found in the documentation.

ShowPDF=no
ShowSettings=never
ShowSaveAs=never
ConfirmOverwrite=no
Output=<commonapplicationdata>\PDF Writer\<printername>\Output\<docusername>\<smarttitle> - <date> <time> - <guid>.pdf
ShowProgress=no
ShowProgressFinished=no
SuppressErrors=yes

;Include a PDF background
superimpose=<commonapplicationdata>\PDF Writer\<printername>\background\background.pdf
superimposeresolution=vector
superimposelayer=bottom

;Print to physical Printer "Brother"
;Note: You may need named-user Expert License(s) or a
;company expert license to get this configuration to work!
PrintToPrinter=yes
PrinterName=Brother
PrinterSelection=specific
Alternative techniques
Use PDF Mailer PlugIn and control characters @@pf
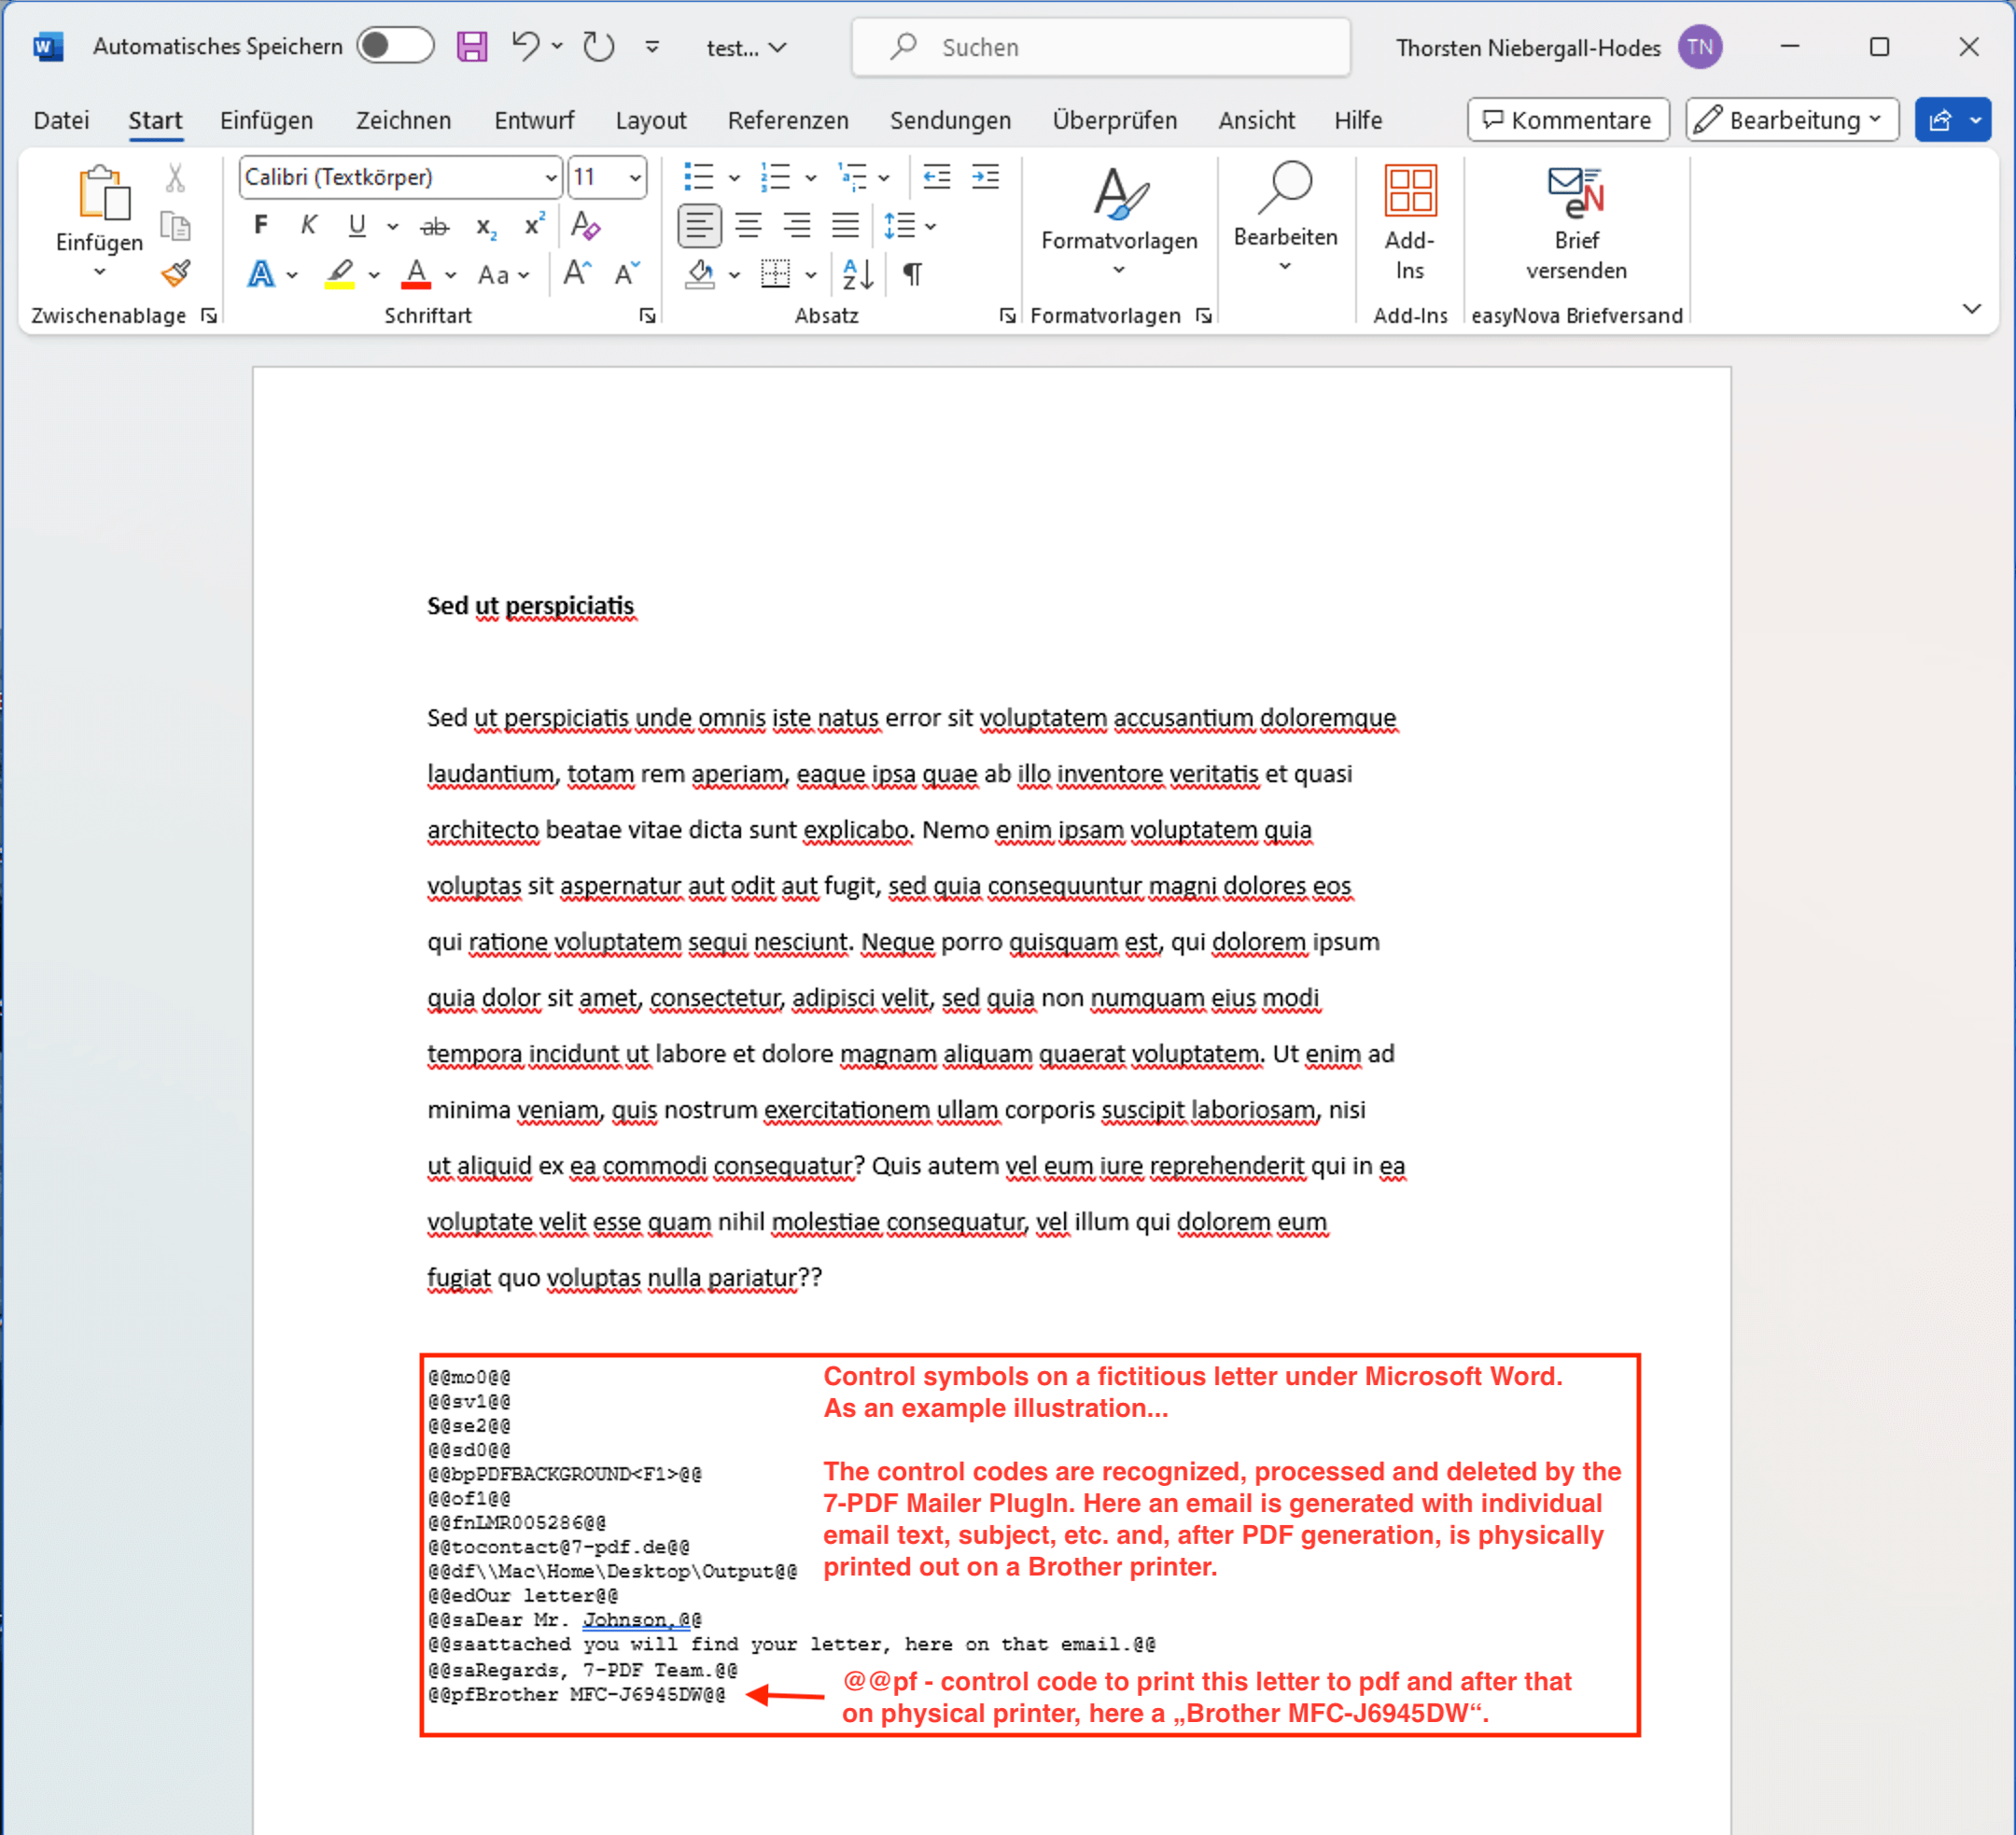
 The solution shown below uses our PDF Mailer PlugIn and the principle of storing control characters in print data. The following screenshot shows an example of integrated control characters in a Word document. These control characters could just as easily be located in a Word header or in the footer area and hidden in a smaller font size. When printing this Word document on a 7-PDF Printer printer instance that is bound to the PDF Mailer PlugIn, these control characters would be read, processed and then deleted by the PlugIn. The control characters shown here in the example would create a PDF with PDF background paper after printing the Word document via a linked PDF printer instance, then open an email in Outlook with the printed PDF as an email attachment and an individual email subject and body text. The PDF Mailer PlugIn would then use the control character
 @@pfBrother MFC-J6945DW@@ (last control code line) to physically send the PDF to printer "Brother MFC-J6945DW".
For efficient and dynamic printing process control, our PDF Mailer PlugIn can also be used to physically print out a PDF document. In addition to many other features that our plugin has to offer.
Command line tool PDFCMD.EXE
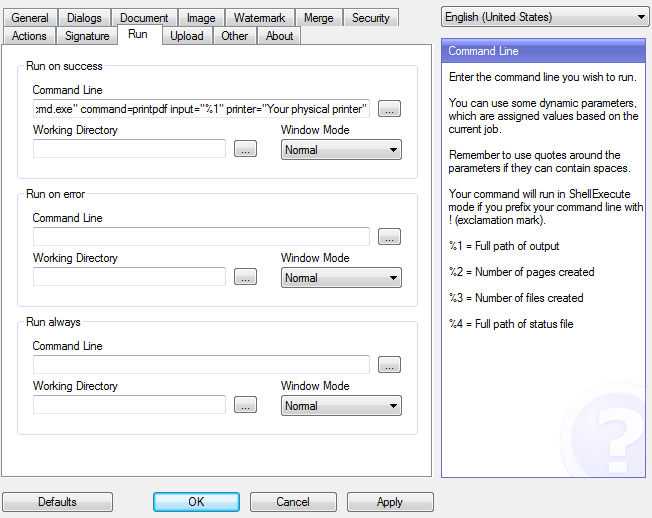
The idea behind the following alternative solutions are that you use the Run on success setting to run a program that sends the PDF to a printer. However, these alternative approaches also have advantages and disadvantages that we will discuss below.
There are different ways to send the PDF to a printer. The one used here is the command line tool PDFCMD.EXE found in the program folder of the printer. It has the following options.
PDFCMD command="merge|printpdf"

Additional parameters for merge operation
-----------------------------------------
output                  File name of output PDF.
input                   Input files to merge. Multiple input files must be
                        separated by a |.
timeout (optional)      Maximum timeout in seconds for the merge
                        to finish. The default is 60 seconds.
pdfprinter (optional)   Name of PDF printer used for the operation.

Example:
PDFCMD command=merge output="C:\temp\merged.pdf" input="C:\temp\A.pdf|C:\temp\B.pdf|C:\temp\C.pdf"

Additional parameters for printing PDF documents
------------------------------------------------
input                   File name of PDF document to print.
pdfprinter (optional)   Name of PDF printer used for the operation.
printer (optional)      Name of the printer that should receive the print job.
firstpage (optional)    First page to print. Default is the first page.
lastpage (optional)     Last page to print. Default is the last page.
scaletofit (optional)   Scale output to fit (yes|no). Default is yes.
bpp (optional)          Bits per pixel. Valid values are 1, 4, 8, 24 (default).
docname (optional)      Document name in printer queue.
maxdpi (optional)       Maximum DPI resolution to print.
timeout (optional)      Maximum timeout in seconds for the print
                        to finish. The default is 60 seconds
Alternative methods are described under Print a PDF from the Command Line
A description of the Run on success setting can be found in the list of settings.
We need to specify the newly created PDF as a parameter to PDFCMD.EXE. This is done using the %1 variable described under the AfterPrintProgram setting. Our command line will look like this:
"C:\Program Files\7-PDF\PDF Printer\pdfcmd.exe" command=printpdf input="%1" printer="Your physical printer name"
Remember to use the full path of the PDFCMD.EXE program.

Please note that this solution does not work in all situations. There may be problems if you try to print landscape documents. In addition, the output is converted to a bitmap and does not keep the vector format used in PDF. Therefore, you will not get a good result if you try to send the output to a new PDF printer.

